

How To Install Windows 10 On Mac Mojave
Classic Mac Pro 5,1 (or simply cMP, also 4,one upgraded to 5,1) is now considered past Apple tree as vintage. Information technology'due south pretty disappointing considering how capable and upgradable these machines still are. Installing Windows is no longer officially supported, but it'due south completely possible though not quite easy.
Another challenge is that macOS Mojave 10.14 now implies using Metal-capable GPU while most of them are non able to brandish Apple tree kick menu (which you normally come across holding the Pick key) required to kick into Windows. Basicaly your screen remains black until macOS is loaded. Well, some EFI bootable cards that support boot bill of fare be but they are released nigh 10 years ago and are really outdated. What is more, none of them supports displaying of boot menu with 4k 60hz monitor connected.
This guide is for those who want macOS Mojave + Windows 10 + modern GPU (in our case Sapphire Radeon Pulse RX 580 8GB).
Updated 28 May 2019
Installing Windows 10 in 5 steps
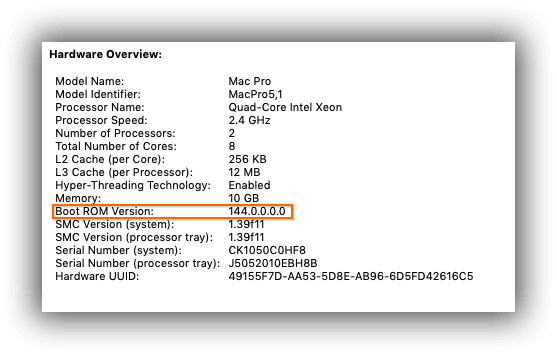
It's supposed that you take the latest Kick ROM version 144.0.0.0.0. If not, please update first.
Step 1: Use carve up drive for Windows
Boot Military camp Assistant no longer supports cMP and doesn't permit creating a separate partition for Windows. Windows has to exist installed on a separate drive, which is good actually to avoid messing with partitions in future.
We recommend using the internal SATA II connector in one of four drive bays or alternatively one of two SATA Two connectors in the optical drive area. Using the HP 654540-001 iii.5" → 2.v" adapter (7$) to identify 2.five" SSD in a drive bay can be quite convenient.
Of cause, SATA II (upwards to 300MB/s) is a clogging for modern 2.5" SSDs (up to 550 MB/s where SATA Three is preferable) simply real life experience shows that the difference is hardly noticable unless y'all deal with lots of big files (e.g. >1GB where sequential read/write speeds matter) on your arrangement drive.
Nosotros didn't examination using PCIe → SATA III adapter or PCIe → NVMe adapter for Windows partition. Many people reported it was not possible in their case. If you lot successfully did it please let u.s. know in the comments below or via electronic mail.
Stride 2: Create a bootable Windows x DVD deejay
Alert : DO NOT install Windows from a USB wink drive. It has been discovered that Windows when installed in EFI mode is corrupting the Mac Pro's firmware past signing information technology with multiple Secure Boot (X.509) certificates. Too, you wouldn't be able to kick into Windows after selecting its drive as bootable in macOS Preferences → Startup deejay. Therefore Windows should simply be installed in Legacy BIOS style from an optical drive.
Brand sure that your Windows ten ISO file fits on the DVD disk, in our case we had to burn down Windows 10 1803 ISO (64-bit) to a single-layer DVD+R disc 4.7GB.
Burning a DVD disk under macOS can be done with the post-obit Terminal command:
drutil burn %path_to_iso_file%
On Windows nosotros recommend using the gratuitous ImgBurn app.
Footstep 3: Boot from your Windows ten DVD disk
Turn on your mac while holding the "C" key to kick from the optical disk (if you lot accept PCIe drives installed and can't kicking from the disc, remove those PCIe adapters). Go along with installation normally until you lot see the "Where exercise you desire to install Windows" drive selection screen.

Step 4: Format the target drive
Printing Shift+F10 to launch control prompt. Type the following commands:
diskpart listing disk
At present brand sure to select the correct target drive number Due north (Non your macOS disk), later that type:
select deejay N make clean exit leave
You should now run across your drive as Unallocated space.
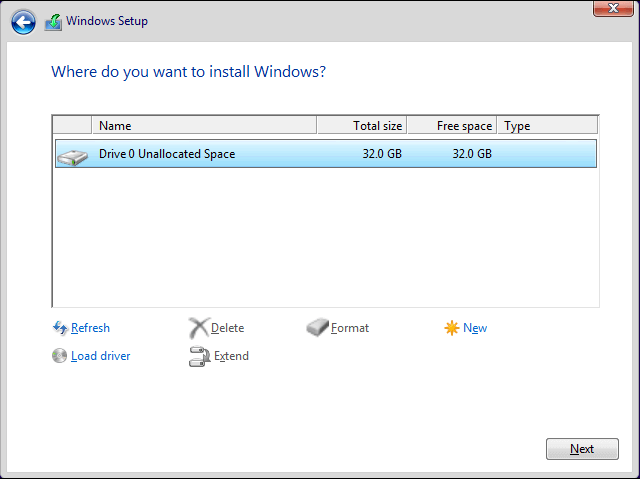
Press the "New" button to create necessary partitions. At that place should exist simply two partitions (for legacy installation, EFI mode creates 4) automatically created:

Select the newly created division 2 and continue with installation normally. Your mac will exist rebooted twice. Every reboot do non forget entering the boot card (past holding the Selection key) and selecting 'Windows' boot drive at that place. When finished, boot into Windows.
Stride five: Install Windows drivers and Kicking Campsite utility
Windows ten installs all necessary drivers automatically except Bluetooth and internal speaker. These demand to be installed from the original Boot Army camp package for MacPro5,1. Download and install 7zip, download Brigadier 0.2.4 app, open Windows command prompt where Brigadier is located and type:
brigadier -m MacPro5,1
When finished, it volition create a folder BootCamp-031-11269, you need to install these for Bluetooth and internal speaker correspondingly, make certain you lot run the command prompt as administrator:
BootCamp-031-11269\Drivers\Apple\x64\AppleBluetoothBroadcomInstaller64.exe BootCamp-031-11269\Drivers\RealTek\RealtekSetup.exe
Now we need newer BootCamp drivers intended for iMacPro1,1:
brigadier -thousand iMacPro1,ane
When finished, it will create a binder BootCamp-041-55643, you demand to run this command:
msiexec /i BootCamp-041-55643\Bootcamp\Drivers\Apple tree\bootcamp.msi
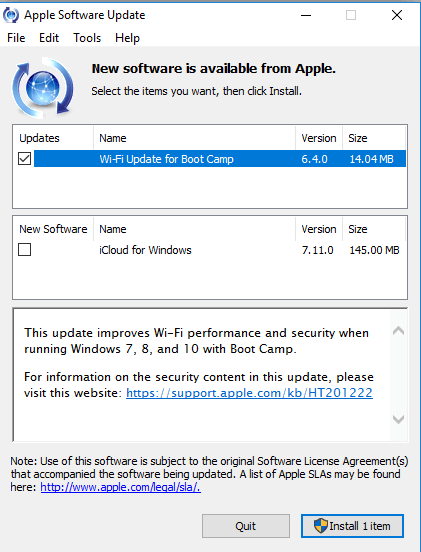
When finished, reboot. We also recommend running Apple Software Update to update Wifi drivers:
You probably don't want to forget installing our awesome Macs Fan Control app, do you? :)
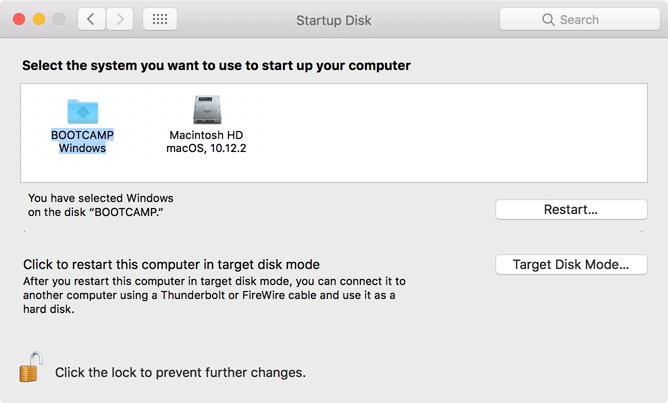
Switching between macOS Mojave & Windows
When you're in macOS, use Preferences → Startup disk to select a boot drive:
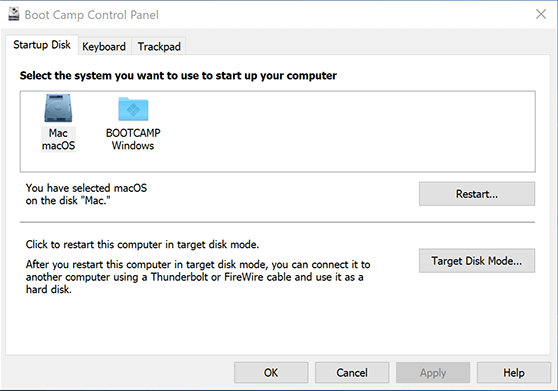
When you're in Windows, use the Boot Camp Control Panel from your Windows tray to select a boot bulldoze:
This guide is based on this MacRumors thread. Special thanks to h9826790 for sharing his useful experience. Any comments are welcome.
Source: https://crystalidea.com/blog/classic-mac-pro-and-windows
Posted by: brownsown1945.blogspot.com
0 Response to "How To Install Windows 10 On Mac Mojave"
Post a Comment